Viral / Detail
The Easiest Way to Take a Screenshot on Your Mac
Jasmine | 26 July 2024 | 18:12
Taking a screenshot on your Mac is a simple process that allows you to quickly capture a picture of your screen. Whether you want to share a funny meme, document a specific error, or save a web page for later, this guide will walk you through the steps.
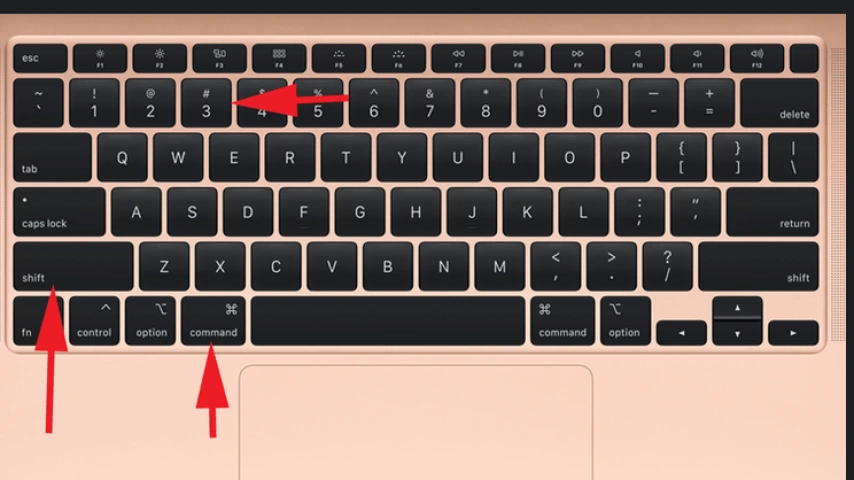
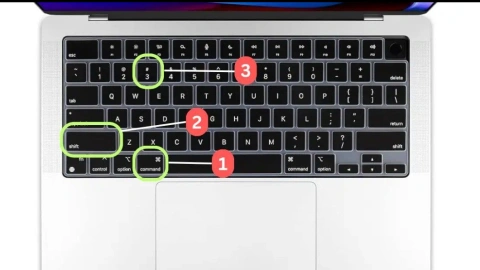
1. Locate the "Command" key: This key is typically found on the bottom left and right corners of your Mac's keyboard. It features an Apple logo and is often labeled as "⌘".
2. Locate the "Shift" key: This key is found on the left and right sides of the keyboard, below the function keys. It is usually represented by an upwards arrow.
3. Press the "Shift" and "Command" keys simultaneously: Hold both keys down at the same time.

4. Press the "3" key: While holding down "Shift" and "Command," press the number "3" key. This combination will capture a screenshot of your entire screen, including the menu bar.
5. The screenshot will be saved automatically: The image will be saved to your desktop as a PNG file. You can access it by opening the "Finder" and navigating to your desktop folder.
Now you can easily capture screenshots on your Mac. This simple technique empowers you to document, share, and save anything you see on your screen. Feel free to explore other variations of the screenshot function by experimenting with different key combinations. For example, you can capture a specific window or part of your screen by pressing "Shift" + "Command" + "4" followed by a click and drag selection.
Related
-

Adidas Samba: The Comfort and Style You've Been Searching For
Viral29 July 2024
-

The Bernese Mountain Dog: A Gentle Giant with a Short but Sweet Life
Viral29 July 2024
-

Maine Coon: The Gentle Giant of the Cat World
Viral26 July 2024
-

The Air Jordan 1 Low: A Timeless Classic for Everyday Style
Viral24 July 2024
Popular
-

-

A Pawsitive History: Dogs of Nuremberg
09 November 2024 -

-

Beyond the Beach: Jamaica's Dog Lovers
29 October 2024 -
